Table of Contents
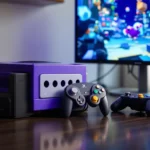
ToggleJoy-Con drift has plagued Nintendo Switch owners since 2017, and in 2026, it’s still the most common reason players search for repair solutions. That phantom stick movement that sends your character wandering off cliffs or ruins your aim in competitive matches isn’t just annoying, it’s a design flaw that’s spawned class-action lawsuits and countless frustration-fueled forum posts.
But drift isn’t the only problem. Connection dropouts, unresponsive shoulder buttons, and worn-out rails can turn your premium controllers into expensive paperweights. The good news? Most Joy-Con issues are fixable at home with basic tools and a bit of patience. Whether you’re dealing with controller drift on your left or right Joy-Con, connection problems, or sticky buttons, this guide covers every major repair scenario with tested methods that actually work.
Nintendo’s official repair service has improved since the early days, offering free drift repairs in some regions, but DIY fixes can save you shipping time and, in many cases, money. Let’s jump into what’s breaking, why it’s happening, and exactly how to fix it.
Key Takeaways
- Nintendo Joy-Con drift, the most common failure since 2017, can be fixed at home using affordable tools ($10-20) and basic disassembly in just 25-40 minutes by replacing the analog stick module.
- Nintendo offers free drift repairs for all US Joy-Con owners regardless of warranty status, though DIY Nintendo Joy-Con repair typically costs less and delivers faster results than the 2-3 week official turnaround.
- Connection and syncing issues can often be resolved with software fixes like controller firmware updates and re-syncing before attempting hardware repairs like antenna reseating.
- Regular maintenance—cleaning the analog stick every 2-3 months with compressed air and gentle handling—can significantly extend Joy-Con lifespan and prevent premature drift and rail wear.
- Shoulder button failures and rail damage require more advanced repairs involving soldering or complete disassembly, making professional repair or full controller replacement a better choice for some users.
- Competitive players and heavy users should expect to replace analog sticks every 1-2 years and consider rotating between multiple Joy-Con sets to distribute wear and maintain performance.
Understanding Common Joy-Con Problems
Before cracking open your controllers, it helps to identify exactly what’s malfunctioning. Joy-Cons share similar construction across all Switch models, original, OLED, and Lite (though Lite controllers are integrated and harder to replace), which means they share similar failure points.
Joy-Con Drift: The Most Notorious Issue
Joy-Con drift occurs when your analog stick registers movement without any physical input. You’ll notice it most when navigating menus or during moments requiring precision aiming. The root cause is wear on the graphite pads inside the analog stick mechanism, combined with dust and debris infiltration.
The left Joy-Con tends to drift more often than the right, likely because it handles movement in most games, constant WASD-equivalent inputs accelerate wear. Nintendo uses the same Alps Alpine analog stick module across Joy-Con generations, which means even 2026 models can develop drift after 6-12 months of regular use.
Drift severity varies. Light drift might only appear in menu navigation. Severe cases make games unplayable, with your character circling endlessly or camera controls going haywire mid-match.
Connection and Syncing Problems
Wireless interference, outdated firmware, or physical damage to the Bluetooth antenna can cause connection dropouts. Symptoms include:
- Controllers disconnecting randomly during gameplay
- Delayed input response (noticeable lag between button press and action)
- Failure to sync when attached to the console or in wireless mode
- One Joy-Con connecting while the other remains unresponsive
The Bluetooth antenna sits near the bottom of each Joy-Con. If you’ve dropped your controller or it’s taken impact damage, the antenna connection might’ve loosened. Software issues account for about 30% of connection problems, a simple controller update or console restart fixes those.
Unresponsive Buttons and Triggers
Shoulder buttons (L, R, ZL, ZR) fail more often than face buttons because they use physical contact switches that wear out. If you’re a Splatoon player or someone who mashes ZR for sprinting, expect these to go first.
Face button issues (A, B, X, Y) usually stem from debris buildup under the rubber membranes or, less commonly, broken solder joints on the circuit board. The plus and minus buttons can also become mushy or unresponsive, though this is rarer.
Trigger failure feels like a button press that doesn’t register, requires excessive force, or activates inconsistently. This is fixable but requires partial disassembly.
Should You Repair or Replace Your Joy-Cons?
The math on Joy-Con repair versus replacement has shifted slightly in 2026. Here’s how to decide.
Cost Comparison: DIY vs. Professional Repair
DIY nintendo joycon repair costs break down like this:
- Replacement analog stick modules: $8-15 per pair on Amazon
- Tri-wing and Phillips screwdriver set: $6-10 (one-time purchase)
- Contact cleaner (isopropyl alcohol 90%+): $5-8
- Replacement rails or buttons: $10-20 depending on parts
Total DIY cost for drift repair: $10-20 if you already own screwdrivers. Multiple repairs cost less per fix since you’ve already bought tools.
Professional third-party repair runs $35-60 per Joy-Con depending on location and issue complexity. Turn-around typically takes 3-7 days if you’re shipping controllers.
Nintendo official repair is free for drift issues in the US (even out of warranty as of late 2023, a policy still active in 2026), but you’ll pay shipping both ways unless you’re near a Nintendo Store. Other repairs cost $40 per Joy-Con through Nintendo.
New Joy-Con purchase: $79.99 for a pair, $49.99 for a single. Colors other than gray or neon red/blue sometimes cost $5-10 more.
When Replacement Makes More Sense
Replace rather than repair if:
- Multiple components have failed (drift + connection issues + broken rail)
- You’ve already attempted repairs and they failed
- The Joy-Con has obvious physical damage, cracked housing, water damage, or broken circuit board traces
- You want a different color and your current controllers are 2+ years old
- The ribbon cable connecting the rail to the main board is damaged (this repair is advanced and easy to botch)
Repair makes sense for single-issue failures, especially drift. Replacing an analog stick takes 20-30 minutes once you’ve done it once. Many players keep spare sticks on hand and swap them out every 8-12 months as preventative maintenance.
If you own a Switch Lite, factor in that Nintendo Switch charging port repairs and Joy-Con fixes are more complex because the controllers are integrated. Lite owners benefit more from professional repair for controller issues.
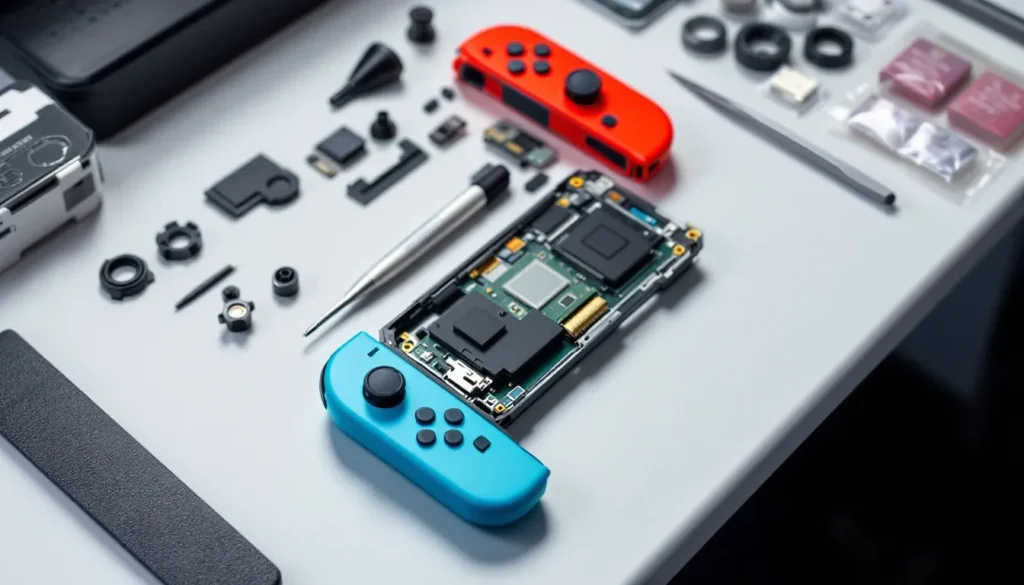
Tools and Materials You’ll Need for Joy-Con Repair
Nintendo uses security screws to discourage user repairs, but the required tools are inexpensive and widely available.
Essential tools:
- Y00 tri-wing screwdriver – for the four outer screws on the Joy-Con back
- Phillips #00 or #000 screwdriver – for internal screws
- Plastic pry tool or spudger – prevents scratching when opening the housing
- Tweezers (preferably anti-static) – for handling small ribbon cables and components
Materials for specific repairs:
- Replacement analog stick modules – buy Alps Alpine-compatible sticks: third-party versions work but quality varies
- Isopropyl alcohol (90% or higher) – for cleaning contacts and analog stick internals
- Compressed air or canned duster – removes debris without disassembly
- Contact cleaner spray – alternative to isopropyl for deep cleaning
- Replacement buttons or rails – if you’re fixing mechanical failures beyond drift
Helpful but optional:
- Magnetic parts tray – keeps tiny screws organized
- Anti-static wrist strap – prevents static discharge (though Joy-Cons are relatively resilient)
- Multimeter – for diagnosing electrical issues, useful for advanced repairs
Most all-in-one Joy-Con repair kits on Amazon ($15-25) include tools and replacement sticks. Based on testing by How-To Geek, the iFixit kits and RGEEK tool sets hold up better than no-name brands with flimsy screwdriver tips.
Before starting any repair:
- Power off your Switch completely (hold power for 3 seconds, select Power Options > Turn Off)
- Detach the Joy-Cons and work on a clean, well-lit surface
- Take photos at each disassembly step, reference images prevent reassembly headaches
- Store screws by step: Joy-Cons use different screw lengths internally
Step-by-Step: How to Fix Joy-Con Drift
There are three approaches to fixing nintendo switch joycon repair drift, ranked from least to most invasive. Try them in order.
Method 1: Cleaning Under the Analog Stick (No Disassembly)
This non-invasive method works for light to moderate drift caused by debris buildup.
- Lift the rubber skirt around the base of the analog stick using a toothpick or thin plastic tool
- Spray compressed air or contact cleaner under the lifted skirt, rotating the stick through its full range of motion
- Rotate the stick vigorously 20-30 times in complete circles while the cleaner is still wet
- Let dry for 5 minutes (isopropyl evaporates quickly)
- Test in System Settings > Controllers and Sensors > Calibrate Control Sticks
Success rate: ~40-50% for recent-onset drift. If drift returns within a week, move to Method 3.
Method 2: Recalibrating Your Joy-Con
Recalibration doesn’t fix hardware issues but can resolve drift caused by software miscalibration or sensor offset.
- Navigate to System Settings > Controllers and Sensors
- Select Calibrate Control Sticks
- Follow on-screen instructions, press the stick you’re calibrating
- Let the stick return to center naturally (don’t touch it)
- Rotate the stick through several full circles when prompted
- Test drift in a game menu or control stick test screen
Recalibration fixes about 10% of drift cases. It’s worth trying before disassembly but rarely solves true hardware drift.
Method 3: Replacing the Analog Stick Component
This is the permanent fix for persistent drift. Total time: 25-40 minutes for your first attempt.
Disassembly:
- Remove the four Y00 tri-wing screws from the Joy-Con back panel
- Gently pry apart the housing starting from the bottom using a plastic spudger, there are clips along the side that pop free
- Disconnect the battery first (small white connector), this prevents shorts
- Remove the Phillips screws securing the mid-frame and analog stick bracket (usually 2-3 screws depending on left/right Joy-Con)
- Carefully disconnect the analog stick ribbon cable, lift the black locking tab on the ZIF connector, then slide the ribbon out
Replacement:
- Remove the defective analog stick module (it may be secured with additional screws or adhesive)
- Position the new analog stick in the same orientation, the ribbon cable should route the same way
- Reconnect the ribbon cable to the ZIF connector and lock the tab down
- Test before reassembly, reconnect the battery temporarily and power on to verify the stick works
Reassembly:
- If the test passes, secure the analog stick bracket and mid-frame
- Reconnect the battery permanently
- Snap the housing together (you’ll hear clicks when clips seat properly)
- Replace the four tri-wing screws, don’t overtighten or you’ll strip the plastic
- Recalibrate using Method 2 above
Common mistakes to avoid:
- Forcing ribbon cables, they’re fragile and tear easily
- Forgetting to unlock ZIF connectors before pulling cables
- Mixing up screw lengths during reassembly (the shoulder button screws are longer)
- Pinching wires when closing the housing
If you’re hesitant about opening your Joy-Con, Nintendo Life has video teardown guides that pair well with written instructions.
Fixing Connection and Syncing Issues
Connection problems usually have software causes, but hardware failures do occur.
Software fixes (try these first):
- Update controller firmware – System Settings > Controllers and Sensors > Update Controllers. The Switch will check for Joy-Con firmware updates automatically when docked and connected to Wi-Fi.
- Re-sync the controller – detach the Joy-Con, hold the sync button (small black button on the rail) for 3 seconds until lights flash, then pair through Controllers > Change Grip/Order
- Restart the console – full power-down, not sleep mode
- Remove interference sources – wireless routers, cell phones, and USB 3.0 devices near the dock can cause Bluetooth interference. The Switch uses 2.4GHz Bluetooth, the same band as most Wi-Fi.
- Test in different locations – if connection is solid in one room but fails in another, environmental interference is the culprit
Hardware diagnosis:
If software fixes fail, open the Joy-Con using the disassembly steps from Method 3 above.
- Check the Bluetooth antenna – it’s a thin wire running along the bottom edge, connected via a tiny coaxial connector. Reseat this connector if it’s loose.
- Inspect the rail connector – the 10-pin connector that links to the console can accumulate grime. Clean with isopropyl alcohol on a cotton swab.
- Look for physical damage – cracks in the circuit board near the antenna or rail usually mean replacement is necessary.
Antenna replacement is possible but tedious, the antenna wire is glued in place. Third-party antennas cost $5-8, but installation requires patience and steady hands.
If connection issues only occur when the Joy-Con is detached from the console (wireless mode), but work fine when attached, the antenna is almost certainly the problem. Controllers experiencing common Switch hardware issues often show multiple symptoms simultaneously.
Repairing Unresponsive Buttons and Triggers
Button failures range from easy cleaning fixes to tricky soldering jobs.
Face buttons (A, B, X, Y):
- Open the Joy-Con following the disassembly process in the drift repair section
- Remove the button membranes, they’re rubber pads that sit under the plastic buttons
- Clean the carbon contact pads on the membranes and the corresponding contact points on the circuit board using isopropyl alcohol
- Check for torn or worn rubber membranes, they’re cheap to replace ($3-5 for a full set)
- Reassemble and test
If cleaning doesn’t work, the tactile switch on the circuit board has failed. Replacing SMD switches requires a soldering iron and moderate soldering skill. Most players opt for professional repair or replacement at this point.
Shoulder buttons (L, R, ZL, ZR):
These buttons use physical microswitches that wear out from repeated clicking.
- Disassemble the Joy-Con
- Locate the shoulder button assembly (separate plastic piece that houses the switches)
- Remove the assembly (usually 1-2 screws)
- Desolder the failed microswitch from the circuit board
- Solder in a replacement microswitch (buy Alps SKQUCAA010 or equivalent)
- Reassemble the button housing and test
If soldering intimidates you, replacement shoulder button assemblies with pre-installed switches cost $8-12 and require no soldering, just swap the entire assembly.
SR/SL buttons (side-mounted):
These small buttons on the Joy-Con rail rarely fail but can become unresponsive if the flex cable connecting them to the main board is damaged. Replacement flex cables cost $5-8 but installation is fiddly, the cable routes through tight spaces and must be positioned precisely.
For button repairs specifically, PCMag’s peripheral repair coverage includes detailed microswitch specifications if you’re sourcing exact replacement components.
Replacing the Joy-Con Rail and Locking Mechanism
Worn rails cause Joy-Cons to slide off the console unexpectedly or fail to lock securely. This is common on heavily used systems, especially if you frequently detach controllers.
Symptoms of rail failure:
- Joy-Con wobbles when attached to console
- Controller slides off with minimal force
- Locking mechanism doesn’t click or hold
- Visible wear or scratches on the metal rail
Replacement process:
- Fully disassemble the Joy-Con (battery, mid-frame, all internal components)
- The rail assembly is the final component, it’s the piece with the metal slider that mates to the console
- Remove screws securing the rail (typically 3-4 Phillips screws)
- Disconnect the rail ribbon cable from the main board (another ZIF connector)
- Install the new rail assembly, routing the ribbon cable identically to the original
- Reconnect the ribbon cable and secure the rail
- Reassemble all other components
Locking mechanism repair:
The locking tab is part of the rail assembly. If only the plastic tab is broken, you can buy standalone locking tabs ($3-5), but replacing the entire rail ($12-18) is easier and more reliable.
Pro tip: When reassembling, ensure the release button (the small button on the back of the Joy-Con) moves freely and fully engages the locking mechanism. If it feels sticky or doesn’t press smoothly, the release button spring may have dislodged.
Rail replacement requires complete disassembly, making it one of the more time-consuming Joy-Con repairs (45-60 minutes for first-timers). If you’re already opening the controller for drift repair, it’s worth inspecting the rail for wear and replacing it preventatively if you see damage.
Nintendo’s Official Repair Service vs. DIY
Nintendo’s repair program has improved significantly since the drift controversy peaked in 2019-2020.
Warranty Coverage and Free Repair Programs
Current Nintendo repair policy (as of 2026):
- Joy-Con drift repairs are free in the US, regardless of warranty status or proof of purchase. This policy was implemented in mid-2023 and remains active.
- Other repairs (buttons, rails, housing damage) cost $40 per Joy-Con if out of warranty
- Warranty period is 12 months from purchase for new Joy-Cons: refurbished units get 3 months
- Turnaround time averages 2-3 weeks including shipping
Official repair process:
- Nintendo’s support site and create a repair order
- Print the prepaid shipping label (Nintendo covers shipping for drift repairs)
- Send your Joy-Con(s) in original or protective packaging
- Nintendo diagnoses and repairs or replaces the controllers
- Controllers ship back, usually within 10-14 business days
Pros of official repair:
- Free for drift issues
- No risk of voiding warranty or damaging components during DIY repair
- Nintendo uses OEM parts
- Refurbished controllers come with 3-month warranty
Cons of official repair:
- 2-3 week wait (longer during holidays)
- You’re without your controllers during repair
- Non-drift issues cost $40
- Nintendo may replace rather than repair, meaning you lose custom shells or modifications
When to choose DIY:
- You need controllers back within days, not weeks
- You’re comfortable with basic electronics repair
- You want to learn the repair for future fixes
- You’ve modified your Joy-Cons and don’t want to lose customization
- You’re outside Nintendo’s free repair regions
When to use Nintendo:
- You’re unsure about DIY repair
- The issue is covered under free repair
- You’ve already attempted DIY and failed
- The problem involves circuit board damage or complex electrical issues
Third-party repair shops are another option, uBreakiFix and local gaming repair shops charge $35-60 but can turn repairs around in 2-3 days. Quality varies, so check reviews. Understanding the internal Switch architecture helps when choosing between repair options.
Preventing Future Joy-Con Problems
Joy-Cons will eventually wear out with heavy use, but you can extend their lifespan significantly.
Drift prevention:
- Clean regularly – lift the analog stick skirt and spray compressed air under it every 2-3 months
- Avoid food and drinks – crumbs and liquid are drift accelerators
- Don’t over-rotate – slamming the stick to its maximum range repeatedly wears the graphite pads faster
- Use a Pro Controller for extended sessions – save the Joy-Cons for portable mode and party games
- Store in a case when traveling – dust and debris infiltration is a major drift cause
Button and rail care:
- Don’t force buttons – mashing harder doesn’t help and accelerates wear
- Detach Joy-Cons gently – always press the release button rather than yanking
- Keep the rails clean – wipe the metal sliders monthly with a microfiber cloth
- Avoid dropping controllers – seems obvious, but impact damage is permanent
General maintenance:
- Update controller firmware when prompted – Nintendo occasionally pushes stability improvements
- Recalibrate sticks every few months even if drift hasn’t appeared
- If you’re a competitive player logging 20+ hours per week, consider rotating between two sets of Joy-Cons to distribute wear
Environmental factors:
High humidity environments accelerate contact corrosion. If you live in a humid climate or play near a bathroom/kitchen, store your Switch in a case with silica gel packets between sessions.
Controllers used by kids tend to fail faster, teach proper handling early. For households with young players, buying third-party Joy-Cons for everyday use and reserving official Nintendo controllers for serious gaming sessions can save money long-term.
The reality: Even with perfect care, analog sticks are consumables. Expect to replace them every 1-2 years with heavy use (400+ hours annually). Light users might get 3-4 years. Players addressing drift problems early prevent minor issues from becoming controller-killing failures.
Conclusion
Nintendo switch controller drift remains the Joy-Con’s biggest design flaw in 2026, but it’s also one of the most fixable. Whether you choose the quick contact cleaner spray, a full analog stick replacement, or Nintendo’s free repair service, you’ve got options that don’t require buying new controllers.
Button and connection issues are less common but equally repairable with basic tools and patience. The key is accurate diagnosis, don’t assume you need to replace the entire controller when a $10 part and 30 minutes of work will solve the problem.
For players willing to learn, Joy-Con repair is an approachable entry point into console maintenance. The skills transfer to other repairs, the tools are inexpensive, and replacement parts are widely available. And if you’d rather not DIY, knowing what’s broken helps you decide between official repair, third-party service, or strategic replacement.
Your Joy-Cons don’t have to be disposable. Fix them, maintain them, and get back to gaming.