Table of Contents
ToggleThe Nintendo Switch’s hybrid design is brilliant, until you realize you’re juggling three different control configurations depending on whether you’re docked, handheld, or sharing Joy-Cons with a friend. Unlike traditional consoles with a single standard controller, the Switch demands a deeper understanding of its modular control ecosystem.
This guide breaks down every button, trigger, and hidden function across all Nintendo Switch control schemes. Whether you’re troubleshooting Joy-Con drift, remapping buttons for competitive play, or just trying to figure out why your character keeps drifting left in Splatoon 3, you’ll find the answers here. No filler, no fluff, just the control knowledge you actually need in 2026.
Key Takeaways
- Nintendo Switch controls vary significantly across three play modes (docked, handheld, and detached), requiring different control configurations and understanding of the modular Joy-Con design.
- Joy-Con analog sticks lack pressure sensitivity and feature smaller travel distance compared to traditional gamepads, affecting precision in competitive games like Splatoon 3 and racing titles.
- The Pro Controller offers better ergonomics and features a proper D-pad, making it superior for fighting games and extended play sessions over Joy-Cons.
- Enable gyro motion controls in shooters and precision games—competitive players find this hybrid approach of stick and motion-controlled aiming significantly improves target acquisition.
- Joy-Con drift remains a persistent hardware issue; Nintendo offers free repairs, though DIY replacement stick modules ($10-15) are available for warranty-conscious players who prefer hands-on fixes.
- System-level button remapping and per-game sensitivity adjustments let you customize Nintendo Switch controls to match your play style, controller preference, and game genre requirements.
Understanding the Nintendo Switch Control Layout
The Switch’s control setup varies significantly depending on your play mode. Each configuration has quirks that affect gameplay, especially in titles demanding precision input. Here’s what you’re working with.
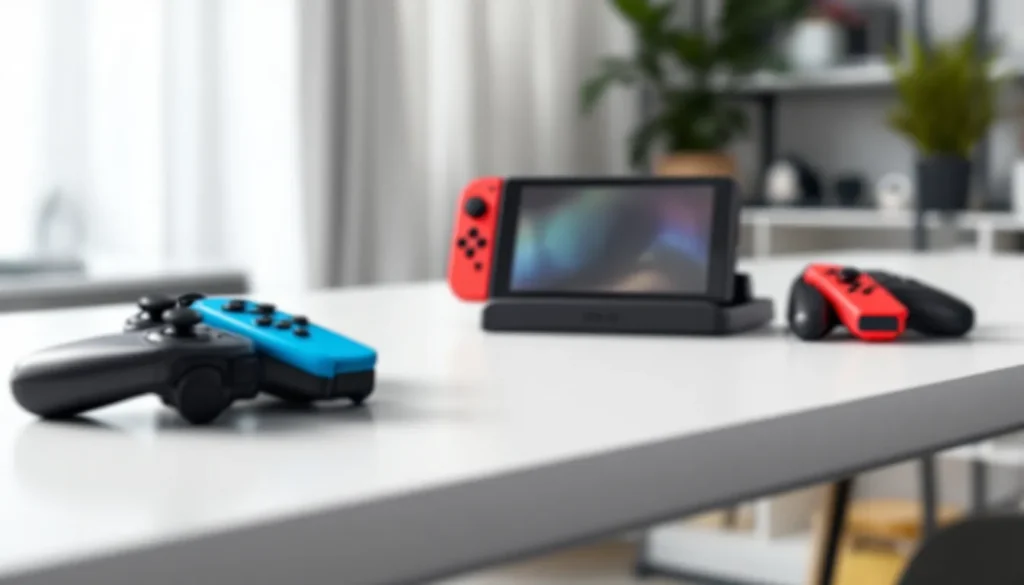
Joy-Con Controllers: Left and Right Breakdown
The Joy-Con controllers are Nintendo’s modular solution, functioning as a pair or independently. The left Joy-Con houses the directional buttons (acting as a makeshift D-pad), an analog stick, L and ZL shoulder buttons, a Minus button, and a Capture button. The right Joy-Con mirrors this with A, B, X, and Y action buttons, its own analog stick, R and ZR triggers, a Plus button, and a Home button.
Each Joy-Con contains an IR Motion Camera (right controller only), NFC reader for amiibo, and HD Rumble motors. When detached, they can operate as individual controllers for two-player games, though the button layout becomes awkward, the SL and SR buttons on the rails become your shoulder triggers in horizontal mode.
The analog sticks on Joy-Cons are notably smaller than traditional gamepad sticks, with less travel distance. This affects precision in shooters and racing games, though Nintendo titles are generally optimized around these limitations.
Pro Controller Button Configuration
The Nintendo Switch Pro Controller follows a more conventional gamepad layout. It features a proper directional pad on the left, left analog stick below it, and standard shoulder configuration with L, ZL, R, and ZR buttons. Action buttons (A, B, X, Y) sit on the right face, with the right analog stick positioned to the lower left.
The Pro Controller includes HD Rumble, motion controls via built-in gyroscope and accelerometer, NFC reader, and amiibo functionality. Battery life clocks in around 40 hours on a full charge, significantly outlasting Joy-Cons.
Button placement differs from Xbox and PlayStation controllers. Nintendo’s A and B buttons are swapped compared to Xbox (A is right, B is bottom), which trips up players switching between platforms. The offset analog stick layout mirrors the Joy-Con arrangement rather than PlayStation’s symmetrical design.
Handheld Mode Controls Explained
In handheld mode, Joy-Cons attach directly to the Switch console, creating a unified control surface. The layout remains identical to detached Joy-Con use, but the experience changes due to the added weight and width of the tablet.
Handheld mode introduces ergonomic challenges for extended sessions. The flat back design lacks the curves of dedicated handhelds, and the weight distribution (approximately 0.88 lbs with Joy-Cons attached for the OLED model) can cause hand fatigue. Many players invest in grip accessories to improve comfort during longer play sessions.
The benefit? Zero input lag and no wireless connectivity issues. Handheld mode also allows for touchscreen input in compatible games, adding an extra control layer not available in docked mode.
Essential Button Functions Every Gamer Should Know
Understanding what each button actually does seems basic, but the Switch has context-sensitive functions that change based on system menus versus in-game use.
Action Buttons: A, B, X, and Y
The A button serves as the primary confirm action in most games and system menus (though some Western-developed titles reverse this to match PlayStation conventions). B typically functions as back or cancel, while X and Y handle secondary actions that vary wildly by title.
In The Legend of Zelda: Tears of the Kingdom, Y swings your weapon, B jumps, X opens inventory, and A confirms selections. In contrast, platformers like Super Mario Odyssey assign jump to B and cap throw to Y. There’s no universal standard, which makes the first few minutes of any new game a button-mashing learning experience.
The action button layout forms a diamond, with A positioned at the right edge, B at the bottom, X at the top, and Y at the left. This physical arrangement affects muscle memory, especially for combo inputs in fighting games.
Directional Controls: D-Pad vs. Analog Sticks
The left Joy-Con’s directional buttons function as four separate buttons rather than a true D-pad. This matters for games requiring precise diagonal inputs or fighting game quarter-circle motions. Many competitive players exploring controller options find this design limiting.
The Pro Controller’s proper D-pad fixes this issue with a traditional cross design. But, early Pro Controller models suffered from accidental diagonal inputs due to a pivot design flaw, later revisions improved this.
Analog sticks handle movement and camera control in most modern titles. The left stick traditionally controls character movement, while the right stick manages camera angles. Both sticks feature L3 and R3 click functions (pressing down on the stick), used for sprinting, crouching, or melee attacks depending on the game.
Stick sensitivity and dead zones vary by title. Some games like Splatoon 3 include in-game sensitivity sliders, while others lock you into developer-chosen values.
Trigger and Shoulder Buttons: L, R, ZL, and ZR
The L and R shoulder buttons sit on the top edge of controllers, while ZL and ZR triggers rest on the underside grip. Unlike Xbox or PlayStation triggers, Switch triggers lack analog pressure sensitivity, they’re digital inputs, either pressed or not pressed.
This limitation affects racing games and shooters that benefit from variable trigger pressure for acceleration or ADS control. Games compensate through alternative control schemes, but the lack of analog triggers remains a hardware shortcoming.
In most shooters, ZL aims down sights while ZR fires. Shoulder buttons (L and R) handle actions like switching weapons or grenades. In Mario Kart 8 Deluxe, ZR and R both accelerate (redundancy for different controller orientations), while ZL and L brake or reverse.
Advanced Control Features and Hidden Functions
The Switch packs several features that elevate control beyond basic button presses. Some are obvious, others remain hidden to casual users.
HD Rumble and Motion Controls
HD Rumble uses linear actuators to create nuanced vibration feedback. Unlike traditional rumble motors, HD Rumble can simulate directional sensations and varying intensities. 1-2-Switch showcases this with marble-counting and safe-cracking minigames that feel eerily realistic.
Most games underutilize HD Rumble, defaulting to standard vibration patterns. Titles like The Legend of Zelda: Breath of the Wild integrate it subtly, you’ll feel different textures when walking on grass versus stone.
Motion controls leverage the built-in gyroscope and accelerometer in both Joy-Cons and Pro Controller. Games like Splatoon 3 and The Legend of Zelda: Tears of the Kingdom use gyro aiming for camera fine-tuning, which competitive players often prefer over stick-only aiming.
Gyro sensitivity can typically be adjusted in-game. When using detached Joy-Cons, each controller tracks independently, enabling gameplay innovations like Super Mario Party or Ring Fit Adventure. Players discussing gaming peripherals on ProSettings frequently cite Switch gyro controls as surprisingly responsive compared to other console options.
Capture Button: Screenshots and Video Recording
The Capture button sits on the left Joy-Con, below the directional buttons. A quick press captures a screenshot, while holding the button for about one second records the previous 30 seconds of gameplay as video.
Video capture works in most games but has exceptions. Some titles disable video recording entirely due to licensing, performance, or developer choice. Screenshots function universally across all software.
Captured media saves to the Switch’s internal storage or microSD card. You can edit screenshots with simple drawing tools, then share them to social media or transfer via USB. As of system update 14.0 and beyond into 2026, direct sharing supports Facebook and Twitter (X), though many players prefer transferring files to PC for better quality control.
Home and Quick Menu Navigation
The Home button (on the right Joy-Con or Pro Controller) returns you to the system home screen from any game. Hold it to access the Quick Menu, which overlays the current game.
The Quick Menu lets you adjust screen brightness, volume, enable airplane mode, and check controller battery levels without fully exiting your game. This is where you’ll find the sleep mode option and quick settings toggle.
The Minus button (left controller) and Plus button (right controller) handle pause menus and additional functions in-game. Plus typically opens the main pause menu, while Minus might toggle maps or secondary screens. In system menus, Minus often functions as a back button.
Customizing Your Nintendo Switch Controls
Nintendo finally added control customization in system update 10.0.0 (April 2020), and it’s expanded since then. Here’s how to make the Switch controller work for you.
Button Mapping and Remapping Options
System-level button remapping lets you reassign any button to any other button, per controller. Navigate to System Settings > Controllers and Sensors > Change Button Mapping. You can create up to five different configurations and switch between them.
This feature works globally across all games and system functions. If you remap A to B, that swap applies everywhere, helpful for accessibility or matching muscle memory from other platforms, but potentially confusing in games with on-screen button prompts that won’t update to reflect your custom mapping.
Remapping saves per controller, not per profile. If you share Joy-Cons or a Pro Controller with someone else, they’ll experience your custom layout unless they create their own saved controller with different mapping.
Some players create specialized mappings for specific genres. For example, platformer enthusiasts might move jump to a shoulder button to enable simultaneous jumping and camera control, a technique called “claw grip avoidance.”
Adjusting Controller Sensitivity Settings
The Switch doesn’t offer system-level stick sensitivity or dead zone adjustment. These settings exist only within individual games that choose to include them. Titles like competitive shooters often feature robust sensitivity sliders, while Nintendo first-party titles rarely do.
Motion control sensitivity, when available, typically appears in in-game options menus under control settings. Splatoon 3 offers separate sensitivity values for motion-controlled camera movement on both X and Y axes, ranging from -5 to +5.
If you’re experiencing drift or unresponsive controls, the system includes a calibration tool rather than sensitivity adjustment. We’ll cover that in the troubleshooting section below.
Connecting Third-Party Controllers
Nintendo’s controllers work great, but third-party options offer features like customizable back paddles, longer battery life, or ergonomic improvements. Here’s what you need to know about compatibility.
Compatible Third-Party Options
Major third-party manufacturers produce Switch-compatible controllers. 8BitDo offers several models including the Pro 2, which features back paddles and works across Switch, PC, and mobile. PowerA makes officially licensed controllers with Nintendo branding, though most lack NFC and rumble to hit lower price points.
HORI produces the Split Pad Pro, which replaces Joy-Cons in handheld mode with full-sized grips and buttons, but sacrifices wireless functionality, rumble, and motion controls. It’s a trade-off between comfort and features.
Some adapters let you use Xbox, PlayStation, or GameCube controllers on Switch. The 8BitDo USB Adapter and Mayflash Magic-NS convert controller signals, though compatibility varies by game and firmware version.
Third-party controllers generally don’t support amiibo, HD Rumble, or IR camera features. Most include basic rumble and motion controls, but the implementation quality varies. Reviews on gaming sites like Twinfinite frequently test third-party controller features to separate marketing claims from actual functionality.
How to Pair and Configure External Controllers
To pair a wireless third-party controller, navigate to System Settings > Controllers and Sensors > Change Grip/Order. Put your controller in pairing mode (usually by holding a sync button) until it appears on screen.
Wired controllers using USB-C connect directly to the Switch dock or handheld unit. As of system update 13.0.0 and later, the Switch recognizes most standard USB controllers without additional configuration, though not all buttons may function as expected.
Once paired, third-party controllers appear in the controller menu alongside official Nintendo hardware. You can adjust the same system-level button remapping, though some third-party controllers include their own dedicated software for PC-based configuration of back paddles or macros, these custom configurations often don’t transfer to Switch.
Some games block third-party controllers entirely. Super Smash Bros. Ultimate tournaments often restrict controller types, and certain games check for official hardware before allowing online play. Always verify compatibility before purchasing a third-party option for a specific title.
Troubleshooting Common Control Issues
Even the best controllers develop problems. Here’s how to diagnose and fix the most common Switch control issues in 2026.
Fixing Joy-Con Drift and Connectivity Problems
Joy-Con drift, where the analog stick registers movement without input, plagued early Switch models and remains an ongoing issue. The problem stems from wear on the stick’s internal graphite contact pads, which degrade over time creating false inputs.
Nintendo offered free repairs for Joy-Con drift in North America even after warranty expiration following consumer pressure and class action lawsuits. Contact Nintendo Support to initiate a repair ticket, though turnaround times vary by region.
DIY fixes exist but void warranty. Replacing the analog stick module requires disassembly, which several teardown guides detail with step-by-step instructions. Replacement stick modules cost $10-15 from electronics suppliers, but installation demands precision and comfort with small ribbon cables.
Temporary drift fixes include compressed air cleaning under the rubber stick cap or applying contact cleaner (like WD-40 Electrical Contact Cleaner). These solutions offer short-term relief but don’t address the underlying hardware degradation.
Connectivity issues manifest as input lag, disconnections, or controllers failing to pair. First, ensure your Switch firmware is current (System Settings > System > System Update). Outdated firmware causes compatibility problems with controllers.
Interference from other wireless devices, aquariums, or metal furniture can disrupt Bluetooth signals. Test controllers in different locations to isolate environmental factors. If specific Joy-Cons consistently fail to connect, try re-syncing by attaching them directly to the Switch console in handheld mode.
Calibrating Controllers for Optimal Performance
Controller calibration recalibrates stick neutral positions and motion sensors. Navigate to System Settings > Controllers and Sensors > Calibrate Control Sticks. Select the controller and stick experiencing issues.
The calibration screen shows a crosshair that should remain centered when sticks are at rest. Rotate each stick through its full range of motion, then reset it to neutral. If drift persists after calibration, the hardware is likely failing and needs repair.
Motion control calibration fixes gyro inaccuracy. Go to System Settings > Controllers and Sensors > Calibrate Motion Controls. Place the controller on a flat, stable surface and don’t touch it during the calibration process.
If calibration doesn’t resolve issues, test the controller on a different Switch console (if available) to determine whether the problem is controller-specific or console-related. Joy-Cons and Pro Controllers work across any Switch, making cross-testing straightforward.
Game-Specific Control Schemes and Tips
The Switch’s diverse game library means control schemes vary wildly. Here’s how to optimize controls for different titles and genres.
Controls for Popular Nintendo Switch Titles
The Legend of Zelda: Tears of the Kingdom uses a complex control scheme with gyro aiming for bows, motion controls for Ultrahand construction, and context-sensitive actions. Enable gyro aiming in settings for dramatically improved archery precision. The game supports button remapping through the Switch system settings, which many players use to move sprint from B to a shoulder button.
Splatoon 3 benefits enormously from motion controls. Competitive players almost universally enable gyro aiming with sensitivity between +2 and +4. The right stick handles large camera movements while subtle gyro adjustments fine-tune aim. This hybrid approach delivers faster target acquisition than stick-only aiming.
Mario Kart 8 Deluxe offers tilt steering using Joy-Con motion controls, but serious players disable this in favor of stick steering for consistent cornering. Smart steering and auto-accelerate help newcomers but limit advanced techniques like drift-boosting.
Animal Crossing: New Horizons uses a relaxed control scheme with minimal stick precision required. The game added custom button mapping in the 2.0 update, letting players move frequently-used tools to preferred buttons.
For games like Monster Jam, motion steering adds immersion but sacrifices the precision needed for perfect stunt landings. Most racing enthusiasts stick with analog controls.
Optimizing Controls for Different Game Genres
Fighting games demand precise D-pad inputs for special moves. The Joy-Con’s separate directional buttons make quarter-circle and dragon punch motions inconsistent. Pro Controller users fare better, though dedicated fight sticks offer the best experience. Games like Street Fighter and Mortal Kombat support USB fight sticks when docked.
Shooters and FPS titles benefit from gyro-assist aiming. Enable motion controls in titles like Fortnite, Doom Eternal, or Overwatch 2, then use stick for large movements and tilt for tracking. Reduce stick sensitivity to medium-low values when using gyro to prevent over-rotation.
Platformers work well with default Joy-Con or Pro Controller setups. Consider remapping jump to a shoulder button in precision platformers like Celeste or Hollow Knight to enable simultaneous jumping and dash inputs without claw grip.
RPGs and strategy games rarely need control optimization since turn-based gameplay removes timing pressure. The touchscreen in handheld mode often provides faster menu navigation than button inputs in titles like Fire Emblem or Triangle Strategy.
Racing games see mixed results with motion controls. Casual players enjoy tilting the controller, while competitive racers need stick precision for optimal racing lines. Games like GRID Autosport include extensive control customization, experiment with different schemes.
Players creating custom Mii characters will find that touchscreen input in handheld mode offers faster customization than navigating with buttons, especially for precise facial feature adjustments.
Conclusion
Mastering Nintendo Switch controls means understanding that there’s no single “correct” configuration. The modular hardware design creates flexibility, but also complexity, what works for handheld Hades runs won’t cut it for docked Splatoon 3 ranked matches.
The control landscape in 2026 has improved significantly from the Switch’s 2017 launch. System-level button remapping, broader third-party controller support, and refined gyro implementation in major titles give players more control than ever. Yet hardware limitations persist: Joy-Con drift remains an issue, the lack of analog triggers handicaps certain genres, and the separate directional buttons on Joy-Cons still frustrate fighting game players.
Your best approach? Experiment with different configurations per game genre. Enable gyro in shooters, remap jump in platformers, and don’t hesitate to invest in a Pro Controller or quality third-party option if Joy-Cons aren’t cutting it. The Switch’s control versatility is a strength once you learn to leverage it, and resources across Nintendo Life continue to share community-discovered optimizations as new titles release.
The controller you choose and how you configure it directly impacts your gaming experience. There’s no substitute for hands-on experimentation to find what works for your hands, your games, and your play style.